Tables Made Easier
Almost every Word user needs to make tables. The Ribbon provides ways to do the numerous tasks that you need to perform when you compose or modify a table. If you do not know how to perform a task, you can often quickly find a way to perform the task by looking through the options related to tables on the Ribbon. However, there are also simpler ways to perform many of the routine tasks without taking your eyes off of your work and, often, without the need to reach for your mouse to click an option. The tasks that are described on this page are needed so often and the advantage of using many of the easier methods is so great that you will quickly get a return on the time that you invest in reading this page.
This page includes detailed information for performing the following tasks.
- Creating a new table
- Moving about in a table and selecting part or all of it
- Adding rows to a table
- Adding columns to a table
- Moving rows in a table
- Moving columns in a table
- Deleting cells, rows, columns, or an entire table
- Repeating the header row
- Inserting a list into a table
For the Microsoft help topics about creating tables in Word 2013, see Insert a Table. For the Microsoft help topics about creating tables and about adding and deleting table rows, columns, and cells in Word 2010 and newer versions, see Insert a Table, Convert Text to a Table, or Draw a Table. For the Microsoft help topics about creating tables and about adding and deleting table rows, columns, and cells in Word 2007, see Insert or Create a Table. For the Microsoft help topic about formatting tables in Word 2007, see Format a Table.
Creating a New Table
Before you can perform any of the tasks described in the remaining sections of this page, you need to have a table or create a new one. In each version of Word, there are several different ways to create a new table. The following simple procedure creates a table in Word 2010.
To create a new table in Word 2010
- Move your cursor to the place where you want to create the table.
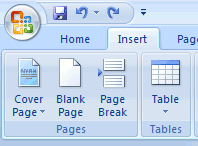
- On the Insert tab, click Table.
- On the grid that appears, select the number of columns and the number of rows that you want to have in your new table.
- Click.
The following simple procedure creates a table in Word 2007.
To create a new table in Word 2007
- Move your cursor to the place where you want to create the table.
- On the Insert tab, in the Tables group, click Table.
- On the Insert Table menu, click Insert Table.
- In the Insert Table dialog box, under Table size, select the number of columns and the number of rows that you want to have in your new table.
- Under AutoFit behavior, select the appropriate options (optional).
- Click OK.
Navigating and Selecting
You can use your mouse and standard keyboard keys to move the cursor to any position within a table. You can click borders or gridlines to select a cell, row, or column in a table, and you can click borders or gridlines with the Shift key pressed to select multiple cells, rows, and columns in a table.
- To select a cell, click the border or gridline that marks the beginning of the cell or triple-click the cell. When you place the mouse pointer over a border or gridline that marks the beginning of a cell, it becomes a short thick diagonal arrow (
 ).
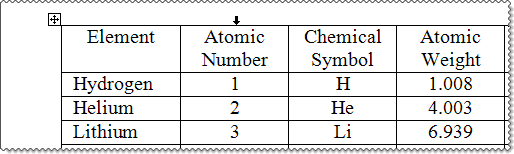
). - To select a column, click the top border or gridline of the column. When you place the mouse pointer over the top border or gridline of a column, it becomes a short thick downward pointing arrow (
 ).
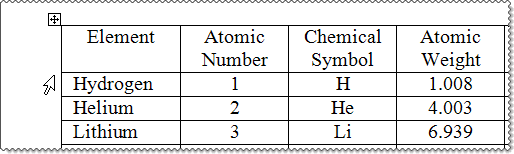
). - To select a row, click the area near the beginning of the row or double-click the border or gridline at the beginning of the first cell or any other cell in the row. When you place the mouse pointer near the beginning of a row, it becomes a large open diagonal arrow (
 ). When you place the mouse pointer over a border or gridline that marks the beginning of a cell, it becomes the short thick diagonal arrow () described above for selecting a cell.
 - To select an entire table, click the table move handle (
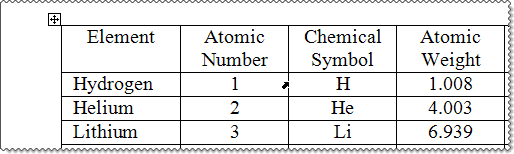
 ), which appears in Print Layout view when you place the mouse pointer anywhere in the table. Be careful not to hold down the mouse button and move the table slightly by accident.
 - To select all the cells in a table, but not the entire table, move your cursor into the first cell in the table, press Alt+Shift+End to select all the cells in the first row of the table, and then press Alt+Shift+Page Down to extend the selection to the last row in the table. The difference between selecting all the cells in a table and selecting an entire table becomes important when you copy and paste from one table into another.
If you prefer performing more of your tasks directly from the keyboard, you can navigate to the applicable cell and select a cell, column, row, or the entire table by using the keyboard shortcuts that extend selections in the following table, which includes additional keyboard shortcuts for performing other useful actions in tables.
| Key | Action |
|---|---|
| Alt+Ctrl+U | Updates the formatting of the table to match the applied formatting. |
| Tab | Selects the next cell. When pressed in the last cell of a table, this key creates a new row and moves to the first cell in it. |
| Shift+Tab | Selects the previous cell or the last cell of the previous row. |
| Alt+Up | Moves to the previous cell or end of the previous row. |
| Alt+Shift+Up | Moves the current row up. |
| Alt+Down | Moves to the next cell or end of row or to the first cell in the next table. |
| Alt+Shift+Down | Moves the current row down. |
| Alt+End | Moves to the end of the row. |
| Alt+Shift+End | Extends the selection to the end of the row. |
| Alt+Home | Moves to the first cell in the row. |
| Alt+Shift+Home | Extends the selection back to the first cell in the row. |
| Alt+Page Up | Moves up to the first cell in the column. |
| Alt+Shift+Page Up | Extends the selection up to the first cell in the column. |
| Alt+Page Down | Moves down to the last cell in the column. |
| Alt+Shift+Page Down | Extends the selection to the end of the column. |
| Alt+(num)5 | Selects the entire current table. |
Adding Rows
The easiest way to add rows to tables depends on whether you want to add a single row or multiple rows and on location where you want to make the addition. There are three general types of additions of rows to tables.
- Addition of a single row at the bottom of a table.
- Addition of a single row between existing rows in a table.
- Addition of multiple rows between existing rows in a table.
The easiest way to add a row at the bottom of a table is to move the cursor into the last cell in the last row of the table and press Tab. This method is widely known, but the interesting thing is that many users discovered this method by accidentally continuing to press Tab as they used this key to move from cell to cell in a table.
The easiest way to add a single row between existing rows without moving your hands from the keyboard is to move the cursor to the beginning of the first cell in the row that is located where you want the new row to appear, press Left, and press Enter. Alternatively, you can use your mouse to place the cursor at the end of the preceding row just outside of the table boundary and then press Enter, or you can right-click the large open diagonal arrow () that appears when you place the mouse pointer near the beginning of the row that is located where you want the new row to appear and then click Insert Rows.
To add multiple rows to a table, place your cursor anywhere in the row above which or below which you want to add the new rows, press Shift+Down to select the number of cells in the same column that is equal to the number of rows that you want to add, and then click the Ribbon option for adding rows above or below the selected cells.
Adding Columns
The easiest way to add columns to tables depends on whether you want to add a single column or multiple columns. To add a single column, select the column that is located where you want the new column to appear by any of the techniques described above in Navigating and Selecting, right-click the selected column, and then click Insert Columns. To add multiple columns, select the column that is located where you want the first of the new columns to appear, extend the selection forward to include the number of columns that you want to add, right-click the selected columns, and then click Insert Columns.
Moving Rows
To move a single row in a table, place the cursor anywhere in the row that you want to move and press Alt+Shift+Up to move the row up one row or press Alt+Shift+Down to move the row down.
To move two or more consecutive rows in a table, place the cursor anywhere in the first or last of the rows that you want to move, press Alt+Up or Alt+Down until a cell is selected in each of the rows that you want to move, and press Alt+Shift+Up to move the rows up one row, or press Alt+Shift+Down to move the rows down.Moving Columns
Unlike rows, columns cannot be moved by pressing a single keyboard shortcut. However, they can easily be moved using the mouse and keyboard or using the keyboard alone. To move a single column in a table, select the entire column that you want to move by clicking the top border or gridline of the column. Alternatively, you can select the column by placing the cursor in the first cell of the column that you want to move and pressing Alt+Shift+Page Down. After the column is selected, press Ctrl+X (or Shift+Delete) to cut it, move the cursor into the first cell of the column that is located where you want the selected column to be and press Ctrl+V (or Shift+Insert) to paste it.
To move two or more adjacent columns in a table, select the columns that you want to move by holding down the Shift key and clicking the top border or gridline of the columns that you want to move in order from left to right or from right to left. Alternatively, you can select all the columns that you want to move by placing the cursor in the first cell of the first or last of the columns that you want to move, pressing Alt+Shift+Page Down, and then pressing Shift+Right or Shift+Left until all the columns are selected. After the columns are selected, press Ctrl+X (or Shift+Delete) to cut the selected columns, move the cursor into the first cell of the column that is located where you want the first of the selected columns to be, and press Ctrl+V (or Shift+Insert) to paste the selection.
You may be tempted to use the mouse to drag the selection to the new location instead of cutting and pasting it. This works in some cases, but the result is often unpredictable.
Deleting Cells, Rows, Columns, or an Entire Table
After you select cells, rows, columns, or an entire table by any of the techniques described above in Navigating and Selecting, you can easily delete the contents of the selected table elements by pressing Delete, but the table and all of its rows, columns, and cells will remain intact. This is a point of confusion for many users, because we are accustomed to seeing everything in a selection deleted when we press Delete outside of tables. This section describes procedures that you can use to delete cells, rows, columns, or an entire table together with their content.
To delete a single cell, a single row, or a single column
- Right-click the cell that you want to delete or any cell in the row or column that you want to delete.
- Click Delete cells.
- In the Delete Cells dialog box, select one of the following options.
- Shift cells left. This option deletes the cell and shifts cells in the row to fill the void.
- Shift cells up. This option deletes the contents of the cell and shifts the cells below it upward in the column.
- Delete entire row
- Delete entire column
- Click OK.
To delete multiple cells, rows, or columns
- Do one of the following.
- To delete multiple cells, select the cells that you want to delete.
- To delete multiple columns, select any cell in the first or last of the columns that you want to delete and press Shift+Right or Shift+Left to select the number of cells in the same row that is equal to the number of columns that you want to delete.
- To delete multiple rows, select any cell in the highest of the rows that you want to delete and press Shift+Down to select the number of cells in the same column that is equal to the number of rows that you want to delete.
- Right-click the selection and click Delete cells.
- In the Delete Cells dialog box, select one of the following options.
- Shift cells left. This option deletes the selected cells and shifts cells in the applicable row to fill the void.
- Shift cells up. This option deletes the contents of the selected cells and shifts the cells below them upward in the applicable column.
- Delete entire row. This option deletes all the rows that contain a selected cell.
- Delete entire column. This option deletes all the columns that contain a selected cell.
- Click OK.
To delete an entire table
- Select the entire table by clicking the table move handle (), which appears in Print Layout view when you place the mouse pointer anywhere in the table, or by pressing Alt+(num)5, that is, by pressing Alt together with the 5 key on the number pad.
- Do one of the following.
- On the Layout tab under Table Tools, click Delete, and then click Delete Table.
- Cut the selection by pressing Ctrl+X (or Shift+Delete).
- If there is a blank line after the table, you can press Shift+Down to extend the selection to include the blank line and then press Delete. In this case pressing Delete completely erases the entire table, because the selection includes something that is outside the table. Note that this alternative together with the use of the Alt+(num)5 key combination provides a way to delete an entire table without moving a hand away from the keyboard.
Inserting a List
To insert a list of data into a table, select the list and press Ctrl+C (or Ctrl+Insert) to copy it to the clipboard. Then select the cells in the table that are located where you want the list to appear, and press Ctrl+V (or Shift+Insert) to paste the clipboard contents into the selected cells. Note that if the selected cells are not empty, this procedure replaces the contents of those cells.
Repeating the Header Row
When a table extends over two or more pages, you may want the header row (the headings at the top of the columns) to repeat on every page on which the table appears. Use one of the following procedures to make the header row repeat on every page.
To repeat the heading row from the Ribbon
- Move your cursor into any cell in the first row of the table.
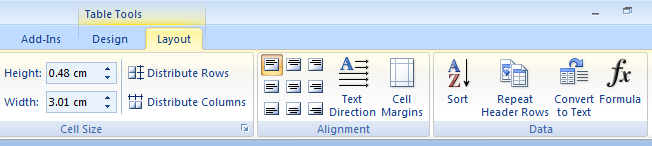
- On the Layout tab under Table Tools, in the Data group, click Repeat Header Rows.
To repeat the heading row using the Table Properties dialog box
- Do one of the following.
- Move your cursor into any cell in the first row of the table, and then on the Ribbon, on the Layout tab under Table Tools, in the Table group, click Properties.
- Right-click anywhere in the first row of the table, and on the context-sensitive menu, click Table Properties.
- In the Table Properties dialog box, on the Table tab, under Text wrapping, verify that None is selected.
- Click the Row tab.
- If Row 1 is not displayed on the first line, click Next Row and/or Previous Row until Row 1 is displayed on the first line.
- Click Repeat as header row at the top of each page.
- Click OK.
Troubleshooting
Sometimes the paragraphs in cells are formatted with a negative right indent. When this happens, the text does not wrap within the cell, and the last few letters in each line are cut off and appear to extend beyond the cell margin.