Sending E-Mail Messages
Everyone who uses e-mail has probably received an e-mail message with many recipients on the To line. Sometimes all the recipients know one another or work together, and each recipient already knows or can easily obtain the e-mail addresses of all the other recipients. In such cases it may even be useful for all the recipients to know who else received the message, and generally no harm is done. However, sometimes some of the recipients do not want their e-mail address revealed to all the other recipients. Some recipients may even feel that their privacy was invaded. You yourself may not always want your recipients to know your complete mailing list. You also may not want your recipients to see their names somewhere down a long list. Some users try to get around these problems by inserting the e-mail addresses of the intended recipients on the Bcc line. However, many spam filters treat such messages as spam and block them from reaching their destinations. If you need to send an e-mail message to a group of recipients and you do not want to disclose their e-mail addresses or their identities to the other recipients, you can use the Word mail merge feature to generate individual personalized e-mail messages with the same basic text that will be sent to each recipient with only one individual recipient's e-mail address on the To line.
The Word mail merge feature is a powerful and versatile tool that can be used for many purposes. Although it may seem at first to be an advanced feature, using it to generate and send individual personalized e-mail messages that have only one e-mail address on the To line is fairly simple. This page presents a simple tutorial that will show you how you can easily use the Word mail merge feature to send personalized e-mail messages and introduces you to the power of this feature. After you know how to accomplish this relatively simple task with it, you will be ready to move on to tasks of increasingly greater complexity.
The rest of this page is divided into the following six sections. The first provides a general description of the mail merge process, and the next three sections contain step-by-step procedures for implementing the mail merge process in different situations. The last section contains the simple procedures for e-mailing Word documents without using the mail merge feature. Note that you need to use only the one procedure that is suitable for your purposes and your version of Word.
- The Mail Merge Process
- Using the Mail Merge Wizard
- Using the Mailings Tab on the Ribbon
- Other Types of Mail Merges
- E-Mailing Word Documents without Using Mail Merge
Note. In order to send any e-mail message from Word, you must have at least one e-mail account configured in Office Outlook, and Outlook must be open. It is also possible to use a different MAPI (Messaging Application Program Interface) application in which you have configured an e-mail account for sending messages, but that possibility is beyond the scope of this page. Before starting the mail merge process, verify that you have an e-mail account configured in Outlook and, if you have more than one e-mail account configured, select the default e-mail account that will be used to send your e-mail messages.
To do this, open Outlook. On the Tools menu, click Account Settings. In the Account Settings dialog box, if you have more than one e-mail account in the list, you can set one of the accounts as the default account for sending messages by selecting it and clicking Set as Default. If you do not have any e-mail account configured, click Close and follow the instructions in the Microsoft help topic Add or Remove an Email Account (for Outlook 2010) or Add or Remove an E-Mail Account in Outlook 2007 to set up and configure an e-mail account.
The Mail Merge Process
The Word mail merge process typically generates a set of documents or document elements, which contain both content that is common to all the documents or document elements in the set and specific information that can be different in each merged document or element, from two documents, which are called the main document and the data source. In the case of e-mail messages, the mail merge process combines the content in the main document with the list of e-mail addresses of the recipients and other optional information about them that are stored in the associated data source to generate and send a set of e-mail messages. For the data source, you can use your Outlook Contacts list, create a new list of addresses that can be reused afterwards to send other e-mail messages, or use an Office address list that is already stored in a mailing database (.mdb) file, an Excel worksheet, an Access database, or a data file of another type. Although it is generally simplest to use the Outlook Contacts list, the tutorials on this page suggest using an address list created in Word. This is done for the purpose of introducing you to the process of creating a database that can be used in a mail merge process.
Using the Mail Merge Wizard
Word provides a Mail Merge wizard that can guide you through any of several basic types of mail merge processes. You can also set up and run a mail merge process using the Mailings tab without the assistance of the Mail Merge wizard. If you are not familiar with the general sequence of steps in a Word mail merge process, you can benefit greatly from using the Mail Merge wizard. In the case of e-mail messages, the Mail Merge wizard consists of a series of six pages that are displayed in the Mail Merge task pane and correspond to the following six steps.
- Choosing the type of documents that will be generated
- Creating or opening the main document
- Specifying the list of recipients in the data source
- Composing the message in the main document and adding merge fields to it
- Previewing the merged e-mail messages
- Completing the merge
To send e-mail messages using the Mail Merge wizard
- If Outlook is not open, open it before moving on to the next step.
- Open a blank document or a document that contains the content that will be included in all your e-mail messages. Note that a document must be open to run the Mail Merge wizard.
- Open the Mail Merge Wizard in the Mail Merge task pane.
- On the Select document type page of the Mail Merge wizard, select E-mail messages and click Next.
- On the Select starting document page, select Use the current document and click Next.
- On the Select recipients page, select Type a new list and click Create.
- Create a record for one of your recipients.
- Click New Entry and repeat the previous step until you have added a record for each of your recipients.
- After you have added a record for each recipient, click OK.
- In the Save Address List dialog box, type a name for your new address list and click Save.
- In the Mail Merge Recipients dialog box, click OK, and then click Next.
- At the beginning of your main document, type Hi and a space, and then on the Write your e-mail message page, click More items.
- In the Insert Merge Field dialog box, select First Name, click Insert, and then click Close.
- Add a comma after the First Name field, finish writing your e-mail message, and then click Next.
- On the Preview your e-mail messages page, you can preview all the personalized e-mail messages that will be generated by the mail merge process, and there is an option to modify the address list. When you are finished, click Next.
- If you want to keep the main document for reuse in the future, save it before completing the merge.
- On the Complete the merge page, click Electronic Mail.
- In the Merge to E-mail dialog box, in the To drop-down list, verify that the name of the field that holds the e-mail addresses of the recipients is selected, in the Subject line text box, type a subject for the e-mail messages, and in the Mail format drop-down list, select HTML or Plain text to send each merged document as the body of the e-mail message, or select Attachment to send the document as an attachment, and then click OK.
- Close the Mail Merge task pane and the merged document.
To do this, on the Mailings tab, in the Start Mail Merge group, click Start Mail Merge, and then in the drop-down menu, click Step by Step Mail Merge Wizard.
Alternatively, you can select either the Start from a template or the Start from existing document option and then select the template or document that you want to use.
Alternatively, you can select either Use an existing list or Select from Outlook contacts, but one of the purposes of this tutorial is to show you how to create a new list that you can use afterwards to send e-mail messages to the same group of recipients or a modified group of recipients.
To do this, in the New Address List dialog box, in the new row of the table, navigate to the First name column and type the first name of one of your recipients. Next, navigate to the Last name column and type the recipient's last name. Finally, navigate to the last column, which is the E-mail address column, and type (or copy and paste) the recipient's e-mail address. You can optionally add information to any of the other fields.
By default, the new address list is stored in a mailing database (.mdb) file in the MyDocuments\My Data Sources folder of the current user. This file can be stored in any folder, but the default location where Word will look for data sources is the \Program Files\Microsoft Office\All Data Sources folder.
Saving the main document also saves its connection to the data file.
Using the Mailings Tab on the Ribbon
After you are familiar with the mail merge process and do not need the assistance of the Mail Merge wizard, you can use the following procedure to send personalized e-mail messages using the Mailings tab on the Ribbon instead of the Mail Merge wizard.
To send e-mail messages using the Mailings tab
- If Outlook is not open, open it before moving on to the next step.
- Open a blank document or a document that contains the content that will be included in all your e-mail messages.
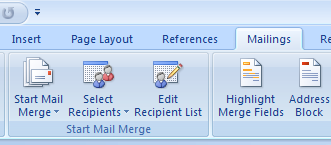
- On the Mailings tab, in the Start Mail Merge group, click Start Mail Merge, and then click E-Mail Messages.
- In the Start Mail Merge group, click Select Recipients, and then do one of the following.
- Click Select from Outlook Contacts.
- Click Use Existing List to use an existing Office address list, Excel worksheet, Access database, or another type of data file, and then locate the applicable file in the Select Data Source dialog box.
- Click Type a new list, and then use the form that opens to create your Office address list, which will be stored in a mailing database (.mdb) file.
- In the Start Mail Merge group, click Edit Recipient List, and then in the Mail Merge Recipients dialog box, you can do any of the following.
- Select individual records.
- Sort records according to any column heading.
- Filter records.
- For each merge field that you want to add to the main document, move the cursor to the location where you want to add the merge field, and in the Write & Insert Fields group, click the Insert Merge Fields button.
- For each merge field that you want to format, select it, including the surrounding double angle brackets (« »), and apply any formatting to it, just as you would format ordinary text in Word.
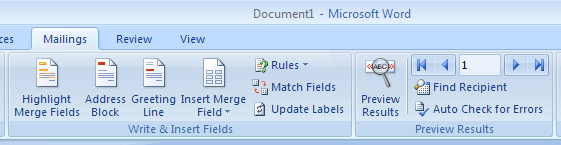
- In the Preview Results group, click Preview Results and use the following buttons to preview the e-mail messages that will be generated when you complete the merge.
- Use the Next Record (
 ) and Previous Record (
 ) buttons as required to move to a specific e-mail message.
 - Click Find Recipient and use the Find Record dialog box to move forward to the e-mail message that will be generated for the next recipient that corresponds to a specified value in any field or in a specified field.
- If you want to keep the main document for reuse in the future, click Preview Results again to return to the main document and save it before completing the merge.
- In the Finish group, click Finish & Merge, and then on the drop-down menu, click Send E-mail Messages.
- In the Merge to E-mail dialog box, in the To drop-down list, verify that the name of the field that holds the e-mail addresses of the recipients is selected, in the Subject line text box, type a subject for the e-mail messages, and in the Mail format drop-down list, select HTML or Plain text to send each merged document as the body of the e-mail message, or select Attachment to send the document as an attachment and click OK.
- You can now close the main document.
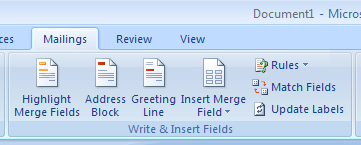
For example, to insert the recipient's first name into each merged e-mail message, move the cursor to the place where you want to add the applicable field in the main document, and in the Write & Insert Fields group, click the Insert Merge Field button below the icon. Note that clicking the icon itself opens the Insert Merge Field dialog box, which is not needed here. Then in the drop-down list that opens, click First Name.
Similarly, you can add an address block by clicking the Address Block button. In this case, in the Insert Address Block dialog box, you select a format for the recipient's name and specify the address elements that will be included.
You can also add a greeting line by clicking the Greeting Line button. In this case, in the Greeting Line dialog box, you select the format of the greeting line, including the punctuation at the end of the line, as well as the text that will appear when Word cannot find the information needed to compose the recipient's name.
Saving the main document also saves its connection to the data file.

Microsoft also provides detailed documentation that can help you use the mail merge feature to send personalized e-mail messages and for other purposes. For the Microsoft help topic about using mail merge to send personalized e-mail messages to multiple recipients in Word 2010, see see Use Mail Merge to Send Personalized Email Messages to Your Email Address List. For the Microsoft help topic about using mail merge to send personalized e-mail messages to multiple recipients in Word 2007, see Use Mail Merge to Send Personalized Email Messages to Your Email Address List.
Other Types of Mail Merges
The Word mail merge feature can also be used to generate other types of documents or document elements from a main document and a data source. These include, for example, letters, business documents, envelopes, and labels. The mail merge process is basically the same as in the case of e-mail messages, but there are also specific steps that you will need to perform for each type of mail merge. The following list is a sampling of Microsoft help topics that provide detailed instructions.
- For a instructions for using mail merge in Word 2010 and newer versions, see Use Word Mail Merge for Email.
- For a quick course on using mail merge in Word 2013, see Mail Merge.
- For information about using mail merge to generate letters in Word 2010, see Use Mail Merge to Create and Print Letters and Other Documents.
- For information about using mail merge to create a set of labels for a mass mailing in Word 2010, see Make Labels for a Mass Mailing.
- For information about using mail merge to create a set of labels for a mass mailing in Word 2007, see Create and Print Labels for a Mass Mailing.
E-Mailing Word Documents without Using Mail Merge
You can also send Word documents in e-mail messages directly from Word without using the Word mail merge feature by performing one of the following procedures.
To send a document as an attachment
- Open or switch to the document that you want to send.
- If you are using Word 2010 or a newer version of Word, on the File tab, click Save and Send, and then click Send Using Email.
- If you are using Word 2007, click the Microsoft Office Button, point to Send, and then click Email.
- In the To and Cc boxes, insert the recipients separated by semicolons.
- Modify the default subject (optional).
- Type the text that you want to appear in the body of your e-mail message.
- Click Send.