Moving to the Ribbon
Many users have expressed their pain and frustration in making the transition to Word 2010 or Word 2007 from a pre-2007 version of Word. Users who were able to proficiently perform nearly all of their tasks unexpectedly found themselves barely knowing how to do a few simple tasks in a new unfamiliar user interface. If you are such a user, you would presumably prefer getting your work done than spending your time re-learning how to do things that you already know how to do quickly and easily from your experience with a previous version of Word.
There are some ways to make the transition to Word 2010 or Word 2007 a little smoother. For one thing, you should know that any sequence of keys that you pressed to open something from a Word 2003 menu still works in Word 2007. You can still press Alt with the letter that opened one of the Word 2003 menus followed by the appropriate letter for one of the menu items to activate that menu item. For example, pressing Alt+T and then O will open the Options dialog box just like in Word 2003. If you remember such sequences, you can still use them.
Also, the keyboard shortcuts that performed tasks in Word 2003 still work in Word 2010 and Word 2007. For example, Ctrl+S still saves your document, Ctrl+A still selects all, etc. Using keyboard shortcuts always had the advantage that they freed you from reaching for your mouse and from looking through menus and now the Ribbon.
Although the Ribbon also replaces the toolbars from previous versions, Word 2010 and Word 2007 provide a customizable Quick Access Toolbar and contextual toolbars that appear, for example, when text is selected.
There is a lot of information on the web to help you with this transition. For example, Microsoft has provided a useful guide in the help topic Migrating to Word 2010 from Word 2003 for Word 2010 users and the Word 2003 to Word 2007 Tools and Commands Reference Guide for Word 2007 users. Another useful guide is the Word 2007 Cheat Sheet provided by the USC Marshall School of Business, which shows the Word 2007 equivalents for everything in the previous menus in one PDF file. These are just two helpful examples. There are many more.
The Quick Access Toolbar
Word 2010 and Word 2007 provide a customizable toolbar, called the Quick Access Toolbar, which displays a fixed set of commands, which you can configure, regardless of which tab is currently displayed. By default, the Quick Access Toolbar is located above the row of tabs in the Ribbon and contains the Save, Undo, and Redo commands.
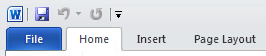
Word 2010
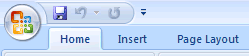
Word 2007
You can move the Quick Access Toolbar to another location closer to your work area at the bottom of the ribbon, and you can add buttons for commands on the Ribbon to it, as well as buttons for other commands, including macros. For more information about changing the location of the Quick Access Toolbar and adding commands to it, see the Microsoft help topic Customize the Quick Access Toolbar for Word 2010 or Customize the Quick Access Toolbar for Word 2007.
In addition, you can also use the following procedure to add a command to the Quick Access Toolbar.
To add a command to the Quick Access Toolbar
- Right-click the Quick Access Toolbar and then click Customize Quick Access Toolbar.
- In the Word Options dialog box, verify that Customize is selected.
- In the Choose commands drop-down list, select type class of commands from which you want to add a command.
- In the list that appears, select the command that you want to add to the Quick Access Toolbar.
- Click the Add button.
- If you want to select a different icon for the command, click Modify.
- Click OK.
The file which stores the configuration of the Quick Access Toolbar is called Word.qat. In Windows XP, the .qat toolbar files for all the Office 2010 and Office 2007 programs are stored in the following location:
C:\Documents and Settings\username\Local Settings\Application Data\Microsoft\Office
In Windows Vista, the .qat toolbar files for all the Office 2010 and Office 2007 programs are stored in the following location:
C:\Users\username\AppData\Local\Microsoft\Office
AutoText
In Word 2010 and Word 2007, the AutoText feature from pre-2007 versions has become part of the Building Blocks feature, which includes numerous galleries of building blocks, one of which is called Quick Parts. There is also an AutoText gallery, but this name may have been included only to help users familiar with this name from previous versions. There are many predefined building blocks, and you can add your own to any of the galleries, but only you define the Quick Parts and AutoText entries.
To create a new Quick Part or AutoText entry
- Select the text that you want to be saved as a Quick Part or AutoText entry and press Alt+F3, just as you did in Word 2003 for AutoText entries.
- In the dialog box that opens, change the name to something short and memorable, notice that the
Gallery is set to Quick Parts by default, and click OK.
Before you click OK, you can change Quick Parts to AutoText in the Gallery dropdown list. This change is not necessary, and if you do make this change, your entry will not be displayed in the list of Quick Parts that you can display by clicking Quick Parts in the Text group of the Insert tab on the Ribbon.
Now, to insert your Quick Part or any Building Block from any gallery into a document, just type its name, and press F3, as you did for AutoText entries in Word 2003.
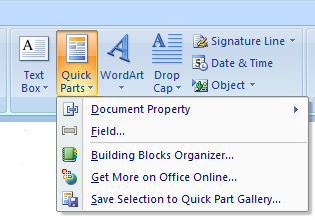
You can manage your Quick Parts from the Ribbon. On the Insert tab, in the Text group, click Quick Parts. This opens a list that includes the names and content of the Quick Parts that you have defined (but not the building blocks that you assign to the AutoText gallery) and an option to open the Building Blocks Organizer.
In the Building Blocks Organizer, you can group your building blocks in the list according to gallery by clicking the Gallery column heading. This will sort your building blocks according to the name of their gallery. If you assign your AutoText entries to the AutoText gallery, they will now be grouped together. Your Quick Parts will also be grouped together.
Disabling Automatic Completion of Dates
If you want to disable the appearance of pop-ups for the automatic completion of dates, etc., you will not find an option in the user interface to stop them from appearing. Instead, press Alt+F11. In the Visual Basic Editor, press Ctrl+G, which opens the Immediate pane. Then, in the Immediate pane, type Application.DisplayAutoCompleteTips = False, and press Enter.
Managing the List of Recent Documents
The list of recent documents changed somewhat in Word 2007 and then again in Word 2010. In Word 2010 the list of recent documents is displayed by clicking the File tab, which is reminiscent of the File menu in pre-2007 versions of Word. In Word 2007 the list of recent documents is displayed by clicking the Microsoft Office Button.
In addition, the possibility of pinning items in the list of recent documents was introduced in Word 2007. By default, each document is marked by an inactive pin ( ). You can pin a document in the list by clicking its pin to transform it into an active pin (
 ), and you can unpin a document by clicking its pin to transform it back to an inactive pin. When the displayed list of recent documents is full and you open additional documents, the last unpinned documents are removed from the list before any of the pinned documents are removed.
Word 2010 provides a simple method for removing all the unpinned items from the list of recent documents. To clear the unpinned recent files, click the File tab, click Recent, right-click any item in the list of recent documents, click Clear Unpinned Items, and click Yes.
Documents that have been deleted or moved to a different location are not removed automatically from the list of recent documents. However, you can manually remove all the documents from the list, and you can change the number of recent documents shown. The procedures for performing these tasks in Word 2010 and Word 2007 are slightly different.
- In Word 2010, click the File tab, click Options, click Advanced, scroll down to the Display section, set the number in the Show this number of Recent Documents list to 0, and click OK. At this point the list will be empty. Then, to start displaying the list of recent documents again, go back and set the number to its previous value or to another number that you prefer (any number from 1 to 50) and click OK.
- In Word 2007, click the Microsoft Office Button, click Word Options, click Advanced, scroll about half-way down the list of options to the Display section, set the number in the Show this number of Recent Documents list to 0 and click OK. At this point the list will be empty. Then, to start displaying the list of recent documents again, go back and set the number to its previous value or to another number that you prefer and click OK.
In both version, you can also remove the last n files from the list of recent documents that are displayed by setting the number to the current number minus n instead of setting it to 0. If you decrease the number of recent documents that are displayed by the number of unpinned items and then increase the number back to its previous value, the pinned items will be grouped together at the beginning of the list.
For more information about using the list of recent documents, see also Opening Documents.
Inserting a File
In Word 2003 there was a simple intuitive way to insert a whole file into the current Word document. You would simply click File on the Insert menu to open the Insert File dialog box, select the file, and click Insert. In Word 2010 and Word 2007, the procedure using the Ribbon is a bit less intuitive.
To insert a file into the current document in Word 2010 or Word 2007, on the Insert tab of the Ribbon, in the Text group, click the little arrow (triangle) next to Object. On the drop-down menu that appears, click Text from file to open the Insert File dialog box and then proceed as in the older versions of Word.
You can also open the Insert File dialog box without reaching for your mouse by using the Word 2003 menu key sequence, that is, by pressing Alt, I, L in succession.